
Laser engraving is quickly growing in popularity thanks to the many at-home entrepreneurs testing out personalized side hustles and all the social media posts celebrating the hobby. The good news for beginners is that getting a laser engraving machine and creating something unique that is just yours doesn’t require years of design experience or a professional workshop.
With the right mindset and a quality machine like the Mecpow M1 Laser Engraver, you can quickly create something polished, functional, and tailored to a family member during the holidays or a coworker you think needs celebrating. Laser engraving is a DIYer's dream, perfect for makers, crafters, and anyone who wants to personalize everyday items.
The goal of this guide is to help you get started with the best laser engraver for beginner projects that can help you turn a fun idea into something tangible you’ll cherish for years to come.
Why Choose Laser Engraving as Your Next DIY Hobby?
A laser engraver is a good beginner hobby because it doesn’t take long to learn, is incredibly satisfying when done right, and can be expanded into all kinds of materials and use cases. In other words, it's fast to get started and fast to finish a broad range of projects.
Some people get a wood laser cutter to add family names to a cutting board or create a sign to hang over an entryway. However, laser engraving isn’t limited to only one type of material. You can use this modern device for leather, acrylic, bamboo, coated metals, paper, and more. It is the flexibility of use that makes laser engraving so attractive.
The most important reason you may find a laser engraver for wood scratching that hobbyist “itch” is that it's beginner-friendly. Machines like the Mecpow laser engraver are designed so beginners just like you can benefit from clear focusing methods, intuitive software compatibility, and precise positioning that eliminates most of the guesswork when you’re starting. There is no need for a graphic design background or technical training, and the projects below are examples of that ease of use.
Remember to take your time, be curious, and practice safety first by following the instructions in your user manual. Here we go!
4 Super-Easy Starter Laser Engraving Projects
#1 – Wooden Bookmark: Learn the Basics of Precision Laser Engraving

Readers unite! Creating a wooden bookmark is a fantastic gift for all the #booktok friends and family in your community. It is an incredibly beginner-friendly project that is low-cost, simple, and teaches the core basics you need to know with a laser engraver for wood in a controlled format that can be repeated as many times as you’d like.
How to make bookmark designs often comes down to your preferred hobbies or favorite book genres. Keep it simple at first. Try a small author’s quote, a wireframe image, and maybe the recipient's name.
What You’ll Learn:
- How to set up engraving versus cutting paths
- What it's like to work with thinner, wooden materials
- How fine-detail laser engraving should be controlled
- How to finish the wooden bookmark with clean edges
Materials Required:
- Thin wood sheets of basswood or similar material
- Design software
- Masking or painter’s tape (the blue stuff works great)
- Finishing oil or wood sealant (and a microfiber rag)
- Optional material for a fun ribbon or tassel at the end
*Basswood is a popular option for wood laser cutter projects because it is soft enough to hold your engraved images evenly, but hard enough to cut cleanly with only a tiny amount of charring.
Step 1: Design Your Wooden Bookmark
Design work is often the part of any laser engraver for wood that intimidates first-time users. You can find a lot of free designs online, so don’t stress over getting the perfect result on the first try. Create a vertical bookmark shape in the design software and keep the thickness around 1.5 to 3 mm to make cutting easier. Add any text (in legible font), patterns, or illustrations, but don’t overcrowd. Negative space on wood looks much better and professional.
Step 2: Prep Your Material
Apply some painter’s tape (or masking tape) to the wood surface before engraving. You’ll want to verify this is safe with your owner’s manual. The goal is to minimize burn marks and keep the wood surface clean, especially when using more detailed patterns or text.
Step 3: Adjust the Mecpow Laser Engraver Settings
Stick to lower power and higher speeds at first for engraving details. When you cut, increase that power and slow everything down so you get a cleaner pass on the wood. You should always begin with a small test on a scrap piece so you get a “feel” for the process.
Step 4: Engrave & Cut
Here comes the fun part! Position the wood according to the laser engraving machine and ensure you have proper focus. Run the engraving pass first, then the cutting pass, so you don’t get any shifting mid-job with the smaller pieces.
Step 5: Finishing the Wooden Bookmark
All that is left to do now is remove the tape, clean any residue, and let it sit for a couple of minutes. You can do some light sanding to smooth any edges. Applying a protective sealant or oil really enhances the engraving contrast. Tie on a ribbon or tassel, and your wooden bookmark is ready to gift. Congratulations on your first successful run!
#2 – Leather Keychain: Experience a New Material

With your wooden bookmark run now complete, it’s time to move on to some other materials your Mecpow laser engraver can handle. Leather might seem a lot more advanced, but when done correctly, it’s surprisingly beginner-friendly. Plus, you can use a leather keychain for so many different applications that everyone in your friend group will appreciate.
The big difference between basswood and leather (or a leather substitute) is the depth control. You may need to run in repeat mode at first until you get the hang of the power settings for the new material.
What You’ll Learn:
- How to laser engrave organic materials
- Why you need to adjust laser focus for thicker materials
- How to create repeatable designs using jigs
- Why assembling engraved components is so much fun
Materials Required:
- Leather or leatherette blanks (usually found in a local hobby store)
- Keyrings or punch-through buttons
- Strong adhesive (something like E6000)
- Design software
- Optional jig if you want to produce a large number (batch) of keyrings
*Leatherette might be a better material choice for your first time. It is cheaper than genuine leather, but it engraves with a strong contrast and forgives those early mistakes pretty well.
Step 1: Create Your Keychain Design
Start with a simplified logo or the initials of your name. You can always upscale to complex geometric patterns, but you want to avoid anything too “fine” for the lines at first, as leather absorbs heat differently than a wooden bookmark.
Step 2: Position the Material
Lay your leatherette blank directly onto the engraving bed as indicated by your user’s guide and software. Here is where you can create a “jig” if you’re producing multiple key chains, but starting with one is a good idea.
Step 3: Focus & Settings
Adjust your Mecpow Laser Engraver to focus on a lower power and moderate speed. The leather thickness really matters, so you should test on a scrap piece to better dial in the contrast without scorching.
Step 4: Engrave
Here we go! Engrave your desired pattern onto the surface. Try to avoid “over-engraving,” which might harden the leather.
Step 5: Assemble
All that is left to do now is assemble, glue, and arrange all the different parts. Make sure you follow the curing time on your glue of choice to get the best “hold” for the keyring.
#3 – Acrylic Cell Phone Holder: Play with Light Transmission Effects

Time to try something new. Around 98% of Americans own a cell phone, making an acrylic cell phone holder a fantastic, hands-free gift. The difference here is that you can use the laser engraver to create a frosted effect that interacts with light more than burning leather or wood. At the end, you get both a functional and aesthetic design that changes with the light in your office, kitchen, or workspace.
What You’ll Learn:
- How to cut versus engraving on acrylic
- How to manage residue and edge quality
- How to assemble using a blending technique
- Why interlocking components are easier than you think
Materials Required:
- Acrylic sheet (your local hardware store has them)
- Masking tape
- Clamps or pins (optional)
- A secondary heat source (like a hair dryer)
Step 1: Design Your Cell Phone Holder
Find a design online that you like. Cell phone stand templates are pretty common, but find one with as few pieces as possible that fits the dimensions of your laser engraving machine.
Step 2: Prepare the Acrylic Sheet
The masking tape should be applied to the top of the acrylic to reduce any residue. You also want the sheet firmly in place and positioned to prevent any shifting.
Step 3: Engrave & Cut
Testing on a small piece isn’t as effective here, so start with a lower power point and higher speed. Cutting requires higher power. For example, you can start with 40 power and 300 speed for a 5 mm acrylic sheet.
Step 4: Optional Bending & Assembly
Some designs require heat to bend or reform interlocking parts. You can use a hairdryer or other heat source to make the acrylic slightly bendable, just practice safety first!
Step 5: Finish the Edges
Remove any masking tape and take your time cleaning the edges. That is how you’ll get the shine you want. You can use a light sealant if you wish, but a bit of water often does the trick. Acrylic projects like this are a good way to see how a laser engraving machine produces retail-ready items.
#4 – Bamboo Tableware Marker: Functional Laser Engraving on Curved Objects

Tableware markers are used on charcuterie boards or specialty dishes that people may not have tried before. They can also be used to indicate different place settings. Either way, they’re a fantastic project for a laser engraving machine because you have to learn how to deal with curved edges, which is why it's recommended to pair this project with the Mecpow G3 Pro rotary roller kit.
What You’ll Learn:
- How to engrave on curved surfaces
- What different positioning and framing can do
- Better depth control
- How to work with a darker contrast
Materials Required:
- Bamboo that is durable and finished (usually a specialty store)
- Clean with a microfiber cloth and oil
- Design software
- Optional: Mecpow G3 Pro Rotary Roller Kit
Step 1: Design the Artwork
Tableware markers come in all shapes and sizes. Start with something simple that doesn’t require many turns, then you can always upgrade your laser engraving game when you’re ready.
Step 2: Prepare the Bamboo Material
Bamboo is thicker and has a little more moisture. That is good because it means you get a darker contrast on your Mecpow laser engraver. Just be sure the piece is clean and free from debris.
Step 3: Set Up Laser & Adjust Settings
Add your optional Mecpow G3 Pro Rotary Roller Kit now if you’re adding a lot of curves to your design. You want the framing to confirm placement before starting, and be sure you’re using a decent power setting for deeper work if the bamboo has resin fills.
Step 4: Engrave & Inspect
Monitor the first pass closely, as bamboo density varies widely. You may have to do some fine adjustments with a laser engraver for wood using this material.
Step 5: Polish & Finish
Bamboo doesn’t need as much oil as other woods, but it can benefit from a light polish with a microfiber cloth.
Mecpow M1 Engraving Machine: A Smart Companion for Beginners
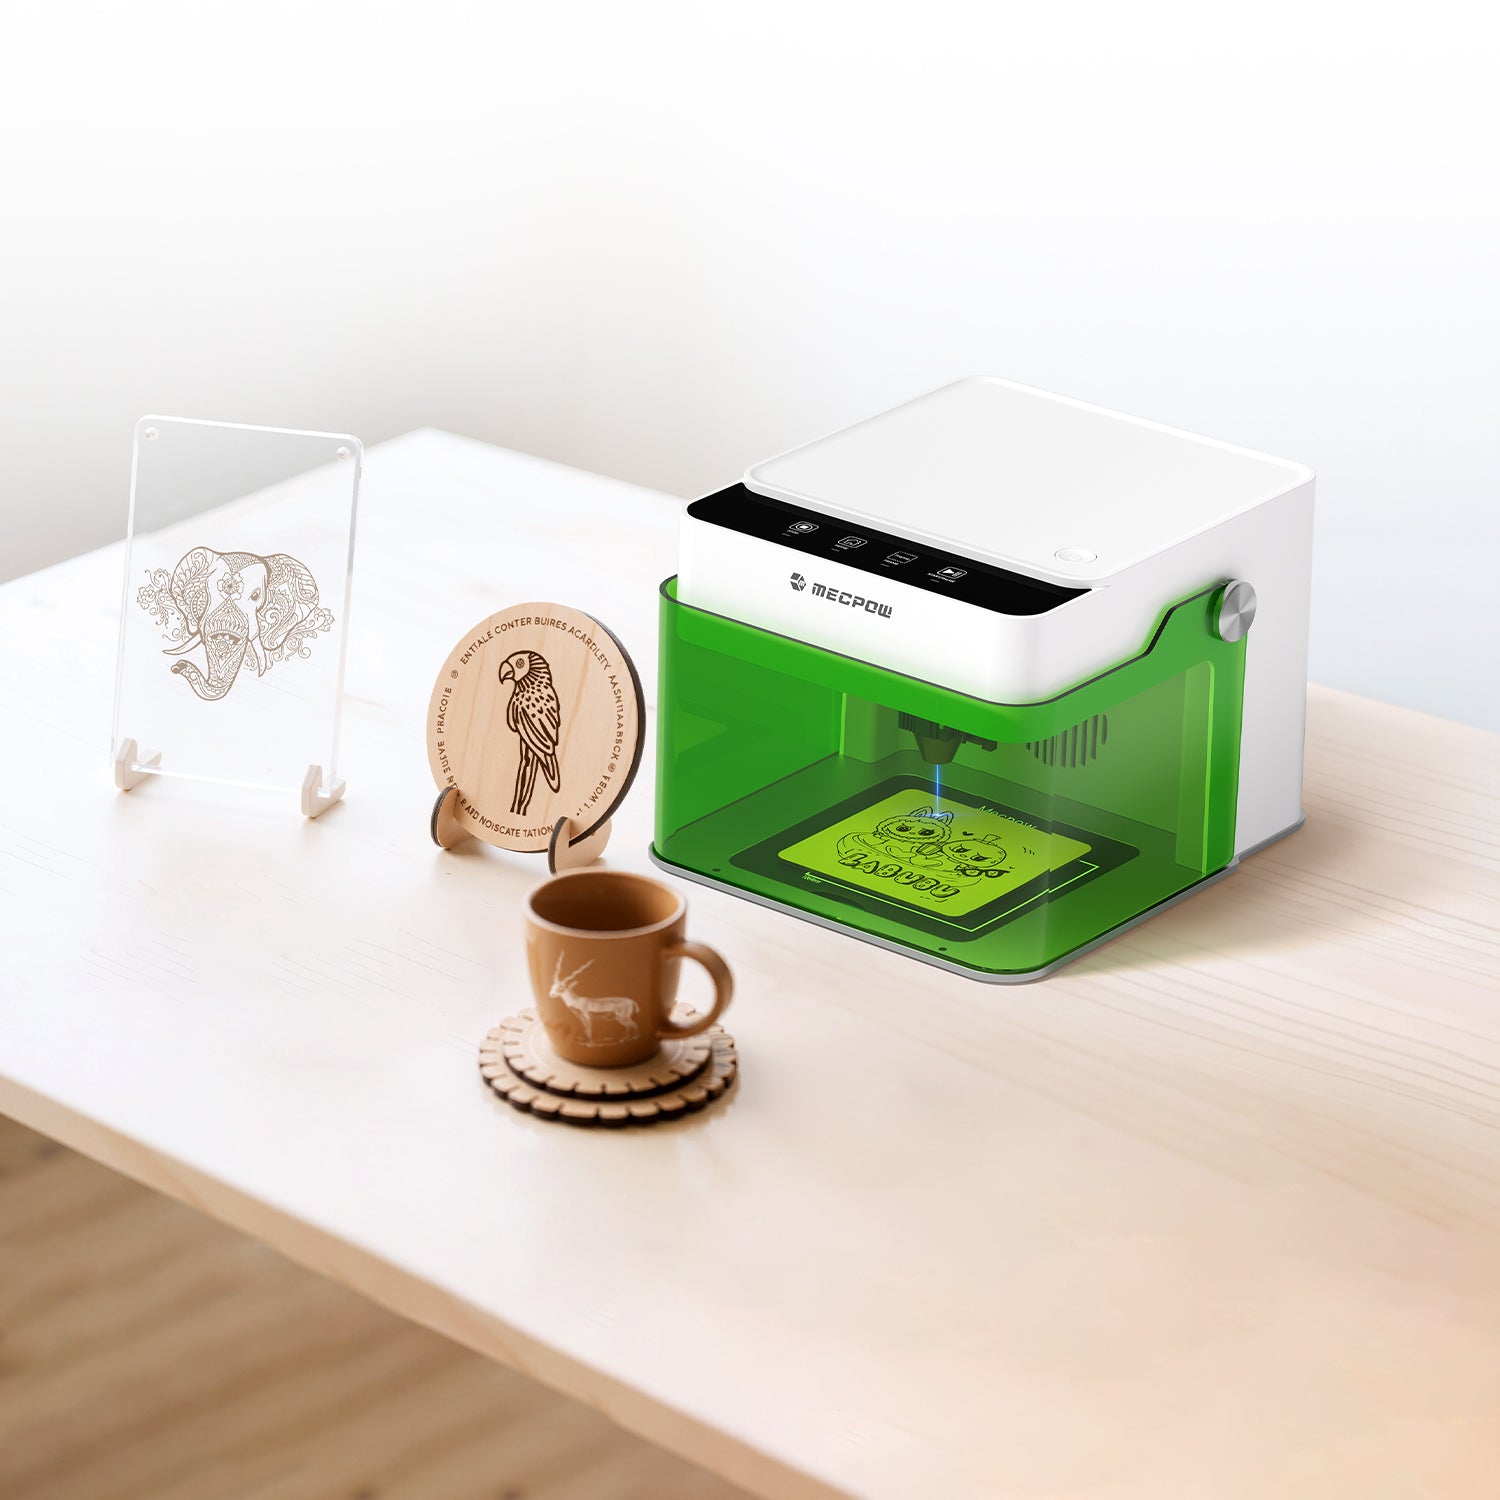
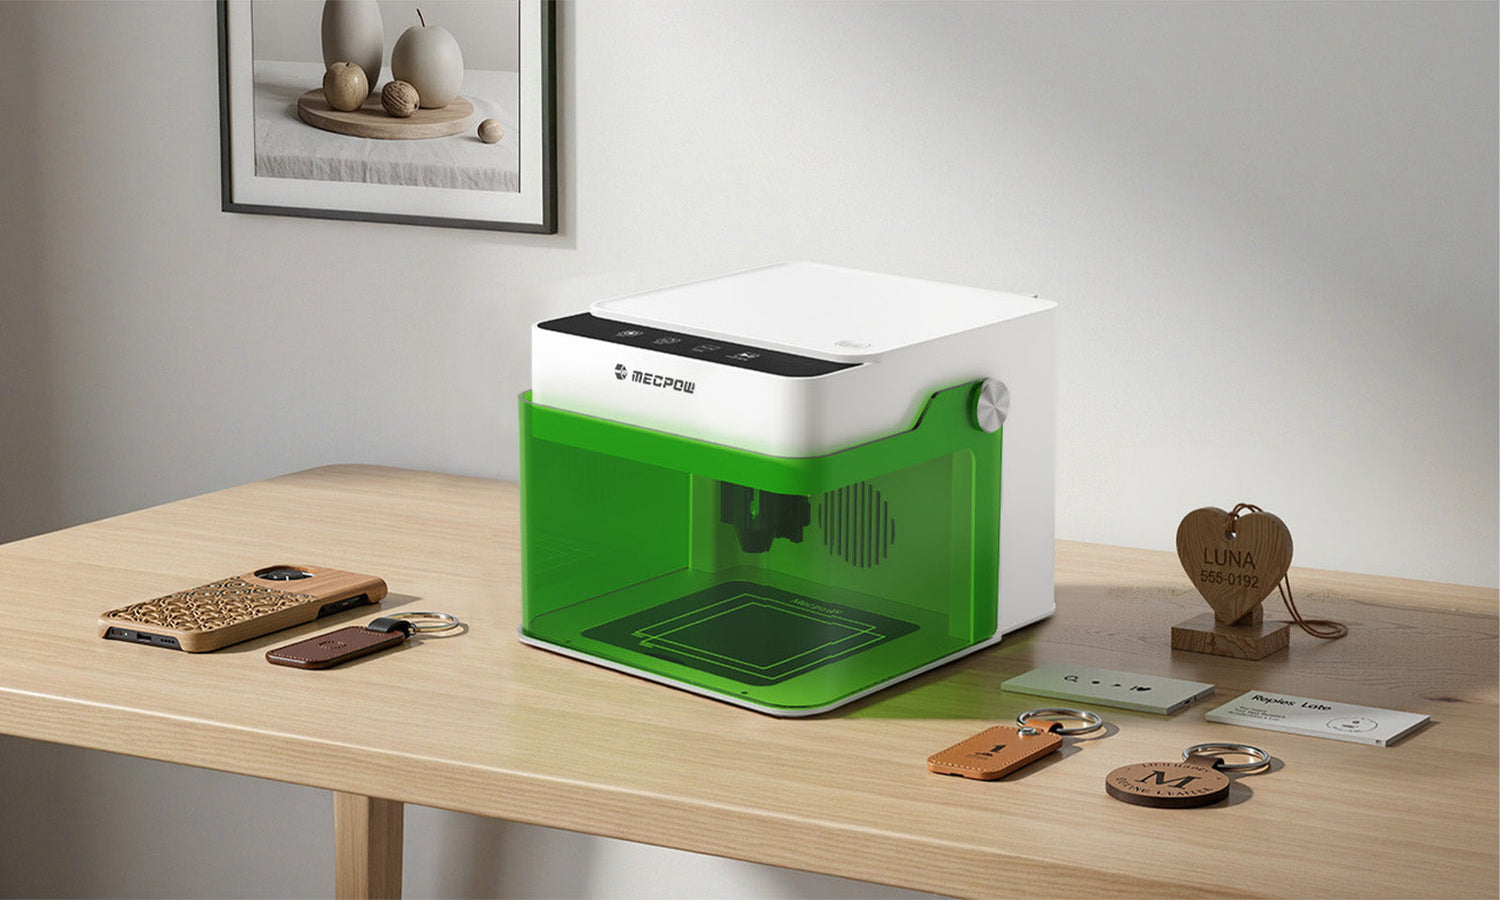
Starting with any laser engraver can feel overwhelming. That is why the Mecpow M1 Engraving Machine is designed to be as user-friendly as possible. There is no complex setup procedure or unclear calibration requirements. Everything is simplified through intuitive positioning and stable construction that a beginner can appreciate.
With multi-compatibility and suitable for over 300 different engraving materials, you get a solid outcome that satisfies all your DIY or makerspace urges.

Laser Engraver Features:
- Enclosed and eye-protected design for better safety
- Includes an auto-stop safety solution
- Odor-free for working in any space with P50 to purify any smoke
- Uses a 3.5W/5W diode laser offering 10000mm/min high-speed engraving
- Engraving area measures 100x100mm with 0.01mm accuracy
- Easily connect using Wi-Fi, USB, or TF card
- Supports popular software, so you can get started quickly
Unlock your full creativity with this laser engraver for wood, leather, acrylic, bamboo, and so much more. You’ll get consistently clean, repeatable results perfect for personalizing your life, creating fun gifts, or starting a side hustle or passion project. Pick up the Mecpow M1 Laser Engraver today and experience the joy of making all kinds of new items.
Start with Simple Laser Engraving and Create Confidently
Laser engraving doesn’t require you to be perfect right away. If anything, the hobby encourages you to be curious and experiment. Over time, you’ll quickly see how testing a new design here or trying new material there can lead to stunning results you and your close friends will enjoy.
From a wooden bookmark you can use in your favorite fantasy series to designing a key chain your sibling uses with their car’s key fob, a reliable laser engraving machine like the Mecpow M1 opens the door to easy, fun, and safe engraving projects.
Try these four beginner-friendly tasks, and you’ll find a DIY hobby that satisfies your creativity and scales up when you want. Learn more by exploring all the laser engraving items at Mecpow today.

Leave a comment
This site is protected by hCaptcha and the hCaptcha Privacy Policy and Terms of Service apply.